Sinkholes in driveways are more than just unsightly—they’re dangerous. They can cause structural issues and pose hazards for vehicles and pedestrians. Whether the sinkhole is due to water erosion, poor drainage, or collapsing soil beneath the surface, it’s important to take action right away. This guide will walk you through how to repair a sinkhole in your driveway properly, ensuring safety and long-lasting results. If you’re ready to discover effective driveway sinkhole repair methods for lasting repairs, read on.
Step 1: Identify The Sinkhole And Assess The Damage
Before you do any digging or mixing of materials, it’s crucial to understand what you’re dealing with. Driveway sinkholes can range from small dips to larger craters that indicate deeper erosion problems. A visual inspection will help, but gently probing the area with a long stick or metal rod can show you how deep or wide the void is underneath.
Take note of:
- The width and depth of the hole
- Whether the surrounding area feels soft or unstable
- Any signs of water pooling or erosion nearby
If the hole is especially deep (more than a couple of feet), you might need to consult a professional. However, for smaller, manageable holes, you can follow the rest of this guide to fix the problem yourself.
Step 2: Clear Out The Damaged Area
Once you’ve assessed the damage, begin preparing the hole for repair. Remove any loose asphalt, gravel, or debris around the sinkhole. This might require using a shovel or pickaxe if the ground is compacted. It’s important to create clean edges around the sinkhole to ensure new material bonds well, and the repair holds.
If vegetation is growing in or around the hole, remove the roots and excess dirt. These can cause future instability if left in place.
Step 3: Dig Down To The Bottom Of The Hole
The goal here is to remove any loose or shifting soil that might cause future collapse. Carefully dig down until you reach firm, compacted ground. You might be surprised to find large gaps or underground voids, especially if poor drainage or a broken pipe is the culprit.
As you dig, watch for signs of water—wet soil or pooling indicates a drainage issue that needs to be addressed before proceeding. If water is present, you may need to install a drainage pipe or fix the underlying leak before continuing.
Step 4: Fill The Hole With Packing Material
Now, it’s time to build a solid foundation for your driveway surface. Start by filling the hole with a sturdy, compactable substance, such as gravel or crushed stone. Using a plate compactor or hand tamper, thoroughly compact each layer after filling it in, about 4 to 6 inches at a time.
This process is essential. Poor compaction leads to shifting material and future sinkholes. Continue adding and compacting material until the filled hole is just a couple of inches below the driveway surface level.
Step 5: Add A Layer Of Sand Or Fine Gravel
To aid in leveling and create a sturdy surface for the last repair material, apply a thin layer of sand or fine gravel once your base layer is firm and well-compacted. This will also help reduce water infiltration and further support the asphalt or concrete patch.
Smooth the sand or gravel layer with a rake and compact it lightly. It doesn’t need to be as densely packed as the lower layers, but it should be even and firm.
Step 6: Patch The Driveway Surface
Now that the sinkhole is filled and compacted, it’s time to patch the surface. The method depends on your driveway type:
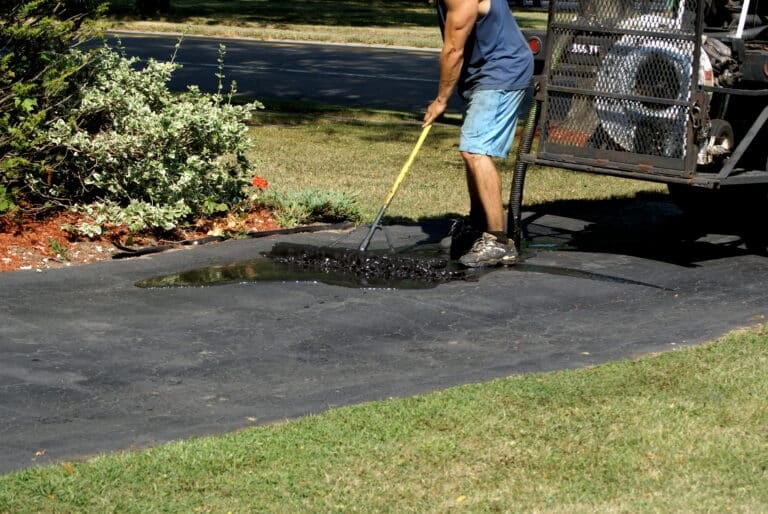
- For Asphalt Driveways: Use a cold-patch asphalt mix. Pour it into the remaining space, slightly overfilling the area. Use a tamper to compact it and blend it into the surrounding surface. This type of repair usually sets well with time and traffic, but you can speed up the process with a compactor.
- For Concrete Driveways: Mix quick-set concrete and pour it into the hole. Use a trowel to smooth and level it with the rest of the driveway. It usually takes 24 to 48 hours for concrete to cure completely, so keep it safe during this time.
Don’t rush this step—your finished surface should be level and seamless with the surrounding area to prevent trip hazards or further wear.
Step 7: Monitor And Maintain
Even after a successful repair, it’s important to keep an eye on the area. Weather changes, drainage patterns, and soil shifting can cause problems to reoccur. Check the repaired section periodically for cracks, dips, or signs of water damage.
If you want to discover effective driveway sinkhole repair methods for lasting repairs beyond DIY fixes, it may be worth consulting a contractor who can evaluate the entire driveway structure and drainage system for potential long-term solutions.
Final Thoughts
Repairing a sinkhole in your driveway may seem daunting, but with the right approach, it’s a manageable task. Proper excavation, backfilling, and surface patching are key to achieving a safe and durable repair. Remember, the sooner you act, the less likely the damage will worsen or spread. And if you’re ever unsure, don’t hesitate to bring in an expert to assess and address more complex sinkhole issues.